
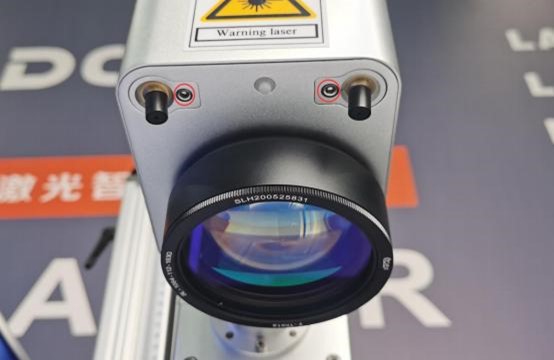
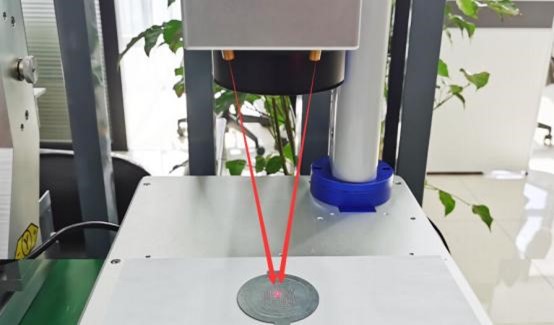
1. Correctly understand the red light indicator point of laser marking machine. DOWIN laser marking machine has 3 red light indicator points, as shown in the figure below:
No. 1 red light indicator point and No. 2 red light indicator point are the laser focal length indicator points, and the No. 3 red light indicator point is the marking position marking red light point.
Note: the third red light indicator point of 20W and 30W lasers is always on , 50W laser will have a red dot indicator only when you click RED.

2. Put the objects on the working platform . Then open the Ezcad software , Text what to mark, then modify the marking size, select the marking content to be centered,
check the continuous marking, and then start to mark.

3. Turn the focus lifting handle of the marking machine by hand, continuously raise and lower the height of the galvanometer many times, observe the marking effect, and find the position with the strongest laser energy

4.Laser marking effect is as shown in the figure below: Figure 1 has the weakest power and Figure 3 has the strongest power. The position of the laser machine at the height of the third marking effect is the correct focus position
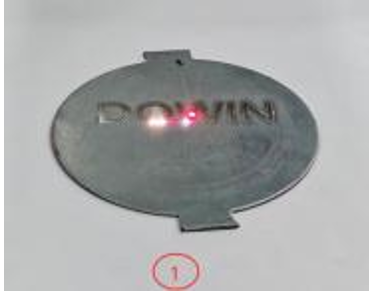
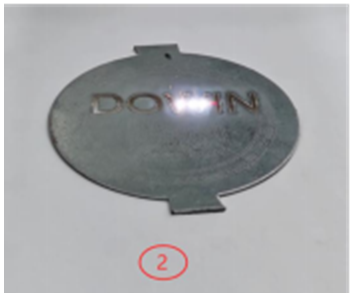
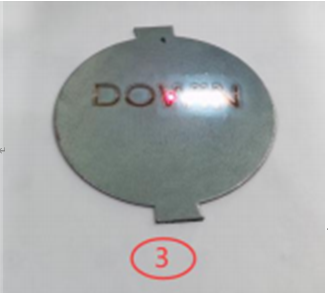
(Laser marking effect diagram)
5. Adjust the fixation screw of the focal length indicator red light on the galvanometer
to make the two focal length indicator red light points overlap into one point.
Note: When using 20W and 30W lasers, the two focal length red laser points overlap to one point is the correct focal length position, and the three red light point does not necessarily overlap into one with them. When using a field lens with a marking area greater than 110, the marking position indicator red light point and the focal length indicator point cannot overlap into one point.
6. Place the new marking material on the working platform of the laser machine, click the start marking button, and then click the red indicator button. Compare whether the
red light indicator is consistent with the actual marking position.

7. If the marking position and the red light indicator position are inconsistent, you need to click the parameter button, select other, select the red light indicator, and adjust the red dot position and size. As shown in the figure below: 1 is to adjust the movement of the red light spot in the X and Y directions, and 2 is to adjust the ratio of the red light spot to the actual marking size


Before adjustment After adjustment
8. After finishing the steps above, congratulations ! you have learned how to replace lens and you can start using your fiber laser marking machine.
Post time: Aug-29-2024
