
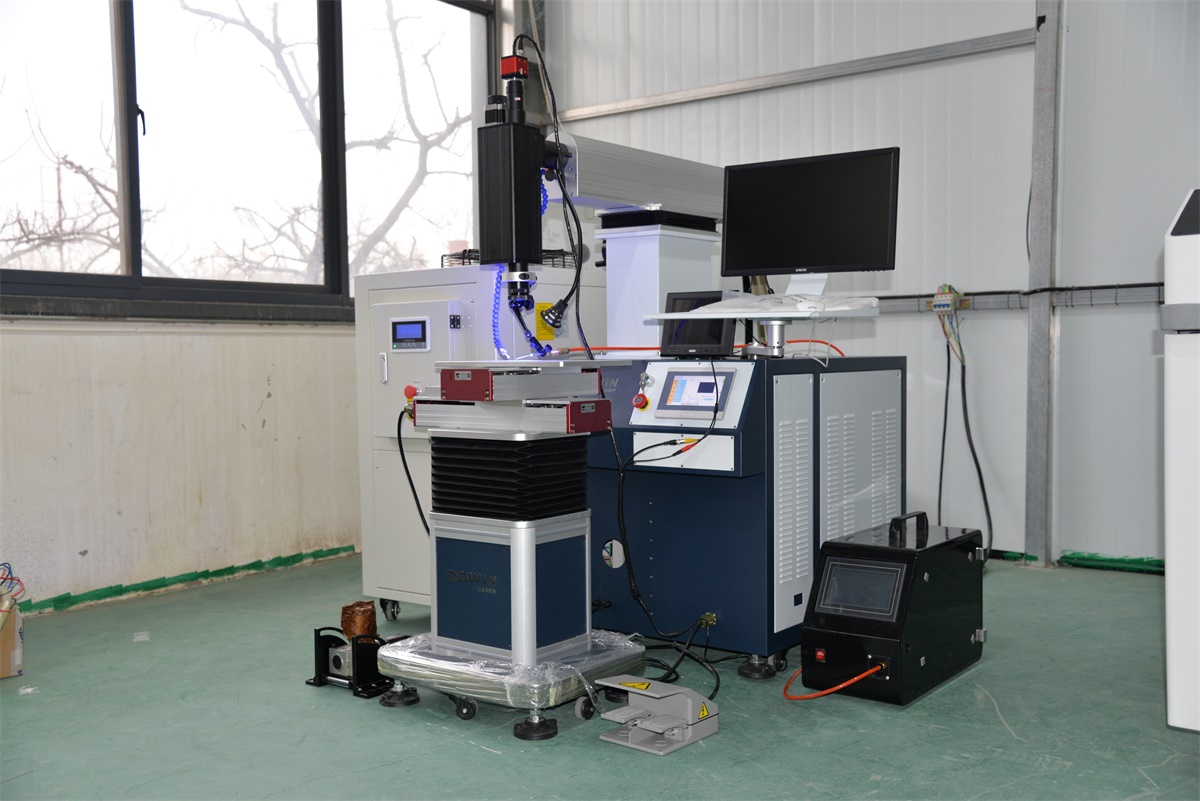
When plastic injection molds develop worn ribs, damaged bosses, or localized material loss, the repair can be more difficult than repairing a flat mold surface. These narrow features require accurate material buildup without changing their original dimensions or surrounding geometry. For manufacturers looking for a reliable injection mold rib repair method, pulsed YAG laser welding can provide controlled material deposition in areas where conventional welding is difficult to manage. Dowin offers laser mold repair welding machines designed for precision mold maintenance, helping mold makers address localized wear while minimizing unnecessary heat input to the surrounding steel.
Why Do Ribs and Bosses Wear in Injection Molds?
Ribs and bosses are common features in plastic injection molds. Although they may appear small, their geometry directly affects the final molded part, including wall thickness, mounting accuracy, stiffness, and dimensional consistency.
Ribs are typically narrow, elongated features used to form reinforcing structures in plastic components. Bosses are raised cylindrical or shaped features used for screw fastening, positioning, and assembly.
Several factors can cause these features to deteriorate over time.
1. Repeated Mold Contact and Mechanical Wear
Repeated production cycles can gradually wear mold surfaces, particularly around narrow edges, shut-off areas, and moving components. Sliding contact between mold components may also damage local features when alignment or clearance is not properly maintained.
2. Abrasive Fillers in Plastic Materials
Glass-fiber-reinforced plastics and other abrasive materials can accelerate mold wear. Thin ribs, core details, and edges exposed to repeated material flow may lose their original dimensions after extended production.
3. Damage During Mold Cleaning and Maintenance
Scraping, polishing, grinding, and other maintenance operations can remove excessive material from small features. A rib may become thinner, while a boss may lose height or develop an uneven top surface.
4. Previous Repairs and Improper Finishing
Previous welding or machining operations may leave insufficient material, uneven transitions, or incorrect clearances. These problems can make subsequent repairs more complicated because the original geometry may no longer be clearly defined.
Before selecting a repair method, determine whether the problem is surface wear, localized material loss, cracking, or deformation. Each condition requires a different repair strategy.
What Makes Injection Mold Rib Repair Difficult?
Repairing a worn rib is not simply a matter of adding metal. The deposited material must restore the original shape without creating additional problems during machining or mold operation.
Limited Welding Access
Narrow ribs and deep cavities restrict the movement of the welding torch, filler wire, and operator’s hand. The welding angle may be particularly difficult when a rib is located between adjacent walls or near another mold feature.
A suitable welding setup should provide:
-
A torch or laser head that can reach the damaged area.
-
Sufficient clearance for filler wire feeding.
-
A stable viewing angle for monitoring the weld pool.
-
Enough working space to avoid damaging neighboring surfaces.
For deep or enclosed features, accessibility should be evaluated before welding begins. A technically suitable welding process may still be impractical if the damaged area cannot be reached consistently.
Controlling Material Buildup on Narrow Ribs
A rib may be only a few millimeters thick, so excessive weld deposition can quickly change its width or create an irregular profile.
Too little filler material leaves the repaired feature undersized. Too much material increases machining time and may make it difficult to preserve the original rib geometry.
The practical objective is to deposit enough compatible material to restore the missing section while leaving a controlled allowance for finishing.
Maintaining Boss Height and Concentricity
Boss repairs introduce a different challenge. If material is deposited unevenly around the boss, the final feature may become eccentric, tapered, or irregular.
Where the boss contains a threaded hole, the repair must also protect the thread and preserve the required relationship between the hole, outer diameter, and surrounding mold features.
In these cases, reference dimensions and machining datums should be established before welding.
Which Welding Method Is Suitable for Worn Ribs and Bosses?
The best repair process depends on the mold steel, the amount of material missing, the accessibility of the damaged feature, and the required final tolerance.
Pulsed YAG Laser Welding
Pulsed YAG laser welding is useful for localized mold repairs that require controlled heat input and precise filler deposition.
Its main advantages include:
-
Localized heating: Helps limit unnecessary thermal exposure to nearby mold surfaces.
-
Fine material deposition: Suitable for rebuilding small damaged sections when the process is properly adjusted.
-
Access to detailed features: A suitable welding head and working arrangement can help reach narrow ribs and small bosses.
-
Reduced finishing workload: Controlled deposition can reduce excess material that must be removed afterward.
However, laser welding does not eliminate the risk of cracking, distortion, or heat-affected zones. Results depend on the steel grade, hardness, pulse energy, pulse duration, filler material, joint preparation, and operator technique.
TIG Welding
TIG welding can be suitable for larger damaged regions where sufficient access is available. However, the broader thermal exposure and larger weld pool may make it more difficult to restore very narrow ribs or small bosses without affecting adjacent geometry.
Conventional Laser Welding vs. Precision Mold Repair
Not every laser welding machine is optimized for mold repair. High-power continuous-wave systems designed for general fabrication may not offer the same practical control as a pulsed system configured for fine mold work.
For small ribs, sharp corners, and localized boss wear, the machine’s ability to deliver repeatable energy at a controlled spot size is often more important than its maximum rated power alone.
Step-by-Step: How to Repair a Worn Mold Rib
A controlled repair process helps prevent the welding operation from creating additional dimensional problems.
Step 1: Inspect the Damaged Rib
Clean the area and examine the rib under magnification. Identify the extent of material loss, any cracks, and signs of previous repair.
Measure the remaining rib thickness and compare it with the drawing, an undamaged equivalent feature, or a reliable reference measurement.
If the rib has cracked at its base, determine whether the crack extends into the surrounding mold steel. Simply building up the visible edge may not address the underlying damage.
Step 2: Prepare the Surface
Remove oil, grease, rust, coatings, and contaminated material. If cracks are present, use an appropriate inspection method to determine their extent and prepare the damaged region according to the repair procedure.
Avoid unnecessary grinding, because removing additional material from an already thin rib can make the repair more difficult.
Step 3: Select Compatible Filler Material
The filler wire should be compatible with the mold steel and the intended service conditions.
For example, molds made from different tool steels may require different filler materials to achieve acceptable hardness, wear resistance, and crack resistance. The selection should account for the original steel grade, heat treatment, and any subsequent finishing or polishing requirements.
Do not select filler material based on color or general-purpose availability alone.
Step 4: Establish Laser Welding Parameters
Set the pulse energy, pulse duration, repetition rate, spot size, and other relevant parameters according to the material and geometry.
A practical starting point is to test the settings on a representative sample or noncritical area before repairing the actual mold.
For a narrow rib, use controlled deposition and avoid concentrating excessive heat at the rib base. Depending on the steel and repair procedure, preheating or other temperature-control measures may be necessary.
There is no single parameter setting suitable for every rib thickness and mold steel.
Step 5: Build Up the Missing Material Gradually
Deposit compatible filler material in controlled increments. Keep the weld pool small enough to maintain visibility and avoid bridging narrow gaps or unintentionally joining adjacent features.
Check the profile periodically rather than waiting until the entire rib has been rebuilt.
The objective is to restore the missing geometry with a modest finishing allowance, not to create an oversized weld deposit.
Step 6: Finish the Rib Profile
After the weld has cooled according to the repair procedure, remove excess material through suitable grinding, milling, or precision finishing.
Pay attention to:
-
Rib thickness and height.
-
Straightness and parallelism.
-
Corner radii and transitions at the rib base.
-
Surface finish where it contacts or shapes the molded plastic.
-
Clearance from neighboring mold features.
Avoid excessive polishing that rounds sharp edges or changes the designed profile.
Step 7: Verify the Repaired Feature
Measure the repaired rib against the original dimensions. Depending on the required tolerance, use a microscope, measuring system, profile measurement, or coordinate measuring machine.
After dimensional inspection, perform any necessary mold fitting and trial molding. Check for flash, incomplete filling, dimensional deviations, and other defects associated with the repaired feature.
How to Repair Worn Bosses Without Changing Their Dimensions
Boss repair requires a slightly different approach because the feature may have a cylindrical surface, a defined height, a central hole, or a specific mating relationship.
Repairing a Boss With Reduced Height
If the boss has lost material from its top surface, first establish the original height and the required finished diameter.
Deposit filler material in controlled layers, leaving sufficient allowance for machining. Then restore the top face to the specified height and finish.
If the boss top includes a sealing surface or a precise contact feature, surface finish and flatness may be as important as overall height.
Repairing a Worn Boss Outside Diameter
For localized wear on the outer diameter, deposit material only where the original geometry has been lost when the repair procedure allows it.
After welding, machine the boss to the specified diameter and verify its concentricity with the central hole or other reference features.
Uneven buildup can produce an eccentric profile even when the average diameter appears correct.
Protecting Threads and Internal Features
If a boss contains a threaded hole, welding heat and spatter must not damage the threads. The repair plan should also account for distortion around the hole.
Use suitable protection and an appropriate machining or thread-restoration procedure where required. Check thread engagement with the specified gauge or mating component after finishing.
For bosses that form part of a shut-off, sealing, or precision locating arrangement, dimensional verification should include the associated mating features.
Common Injection Mold Rib Repair Mistakes
| Common mistake | Possible consequence | Better practice |
|---|---|---|
| Depositing too much filler | Excessive grinding and dimensional errors | Build up material incrementally |
| Using incompatible filler wire | Cracking or unsuitable wear properties | Confirm material compatibility |
| Applying excessive heat | Distortion or cracking | Develop parameters for the specific steel |
| Ignoring welding access | Irregular deposits and missed areas | Evaluate torch and wire clearance first |
| Grinding without reference dimensions | Undersized ribs or bosses | Establish dimensional targets before repair |
| Skipping final inspection | Flash, fit problems, or inconsistent molding | Verify geometry and perform a trial run |
How to Reduce Finishing Time After Laser Welding
Post-weld machining often determines whether a small-feature repair is economical. Even when welding itself takes only a short time, excessive buildup and difficult finishing can increase the total maintenance cost.
Several practices help reduce this workload.
Use controlled deposition. Add material only where required and avoid unnecessarily large weld beads.
Establish the finishing allowance in advance. Determine how much material should remain for grinding or machining based on the final tolerance and the finishing method.
Protect critical edges. Sharp transitions, narrow rib tips, and small radii can be difficult to restore after excessive material removal.
Choose a filler material that supports the finishing process. The deposited material should be compatible with the intended machining, polishing, and service requirements.
Inspect during the repair. Intermediate measurements can identify excess buildup before it becomes difficult to remove.
These practices are especially valuable when a mold contains multiple small ribs or bosses that must be repaired consistently.
Is Laser Welding Better Than Replacing the Damaged Mold Feature?
Laser welding is not automatically the best solution for every damaged rib or boss. The decision depends on the severity of the damage, the mold’s value, the repair location, and the dimensional requirements.
Repair is often worth evaluating when the damage is localized, the original feature can be reconstructed accurately, and the surrounding mold remains in serviceable condition.
Replacement or a more extensive machining solution may be preferable when the feature is severely fractured, the underlying steel has extensive damage, the repair cannot be accessed reliably, or the required geometry cannot be restored with acceptable confidence.
Before committing to welding, compare the total repair cost—including preparation, welding, machining, inspection, and trial molding—with the cost and lead time of replacement.
Choosing a Laser Mold Repair Welding Machine
For mold makers who regularly repair ribs, bosses, shut-off surfaces, and other small features, the machine should be selected according to actual repair requirements.
Important considerations include:
-
Pulse control: The machine should provide suitable energy and pulse-duration adjustment for localized repairs.
-
Spot size and stability: Consistent energy delivery helps control material buildup on narrow features.
-
Filler-wire compatibility: The setup should support the wire sizes and materials required by the mold steels being repaired.
-
Working access: The welding head, microscope, and fixture arrangement should allow the operator to reach the damaged feature.
-
Operator visibility: Clear viewing of the weld pool helps control deposition around edges and confined geometries.
-
Service and training: Parameter development and practical mold-repair experience are important for repeatable results.
Dowin’s official website provides information about its laser equipment. When evaluating a mold repair welding machine, discuss the mold steel, rib or boss dimensions, damage depth, required tolerance, and representative repair samples with the supplier. These details are more useful than choosing a machine based on wattage alone.
Frequently Asked Questions
Can a laser welder repair a very thin injection mold rib?
Yes, a suitable pulsed laser welding system can repair some thin ribs by depositing compatible filler material in controlled increments. Feasibility depends on the rib thickness, steel grade, damage depth, welding access, and required final dimensions. Very thin or cracked features may require a more specialized repair procedure.
What filler wire should be used for injection mold rib repair?
The correct wire depends on the original mold steel, its hardness and heat treatment, and the required wear resistance. The filler should be selected for metallurgical compatibility and the intended finishing process rather than using one wire for every mold.
Will laser welding change the hardness of the repaired mold?
It can. Welding creates a local thermal cycle that may alter hardness or microstructure near the deposited material. The extent depends on the steel, welding parameters, and any preheating or post-weld heat treatment. Hardness testing may be appropriate for critical applications.
Can a worn boss be repaired without replacing the mold insert?
In many cases, yes, if the damage is localized and enough sound material remains to support a reliable repair. The repaired boss must be machined and inspected to restore its specified height, diameter, concentricity, and any thread or mating features.
How can I prevent flash after repairing a mold rib?
Verify the repaired rib’s dimensions and its relationship with the mating mold surface. Check alignment, clearances, and shut-off contact, then perform a controlled trial molding. Flash may also result from clamping, venting, injection pressure, or other mold conditions, so welding should not be assumed to be the only possible cause.
Is pulsed YAG laser welding suitable for all injection mold steels?
No. Pulsed YAG laser welding can be suitable for many mold repair applications, but material compatibility, cracking risk, hardness, and heat-treatment condition must be assessed. Test welding and a qualified repair procedure are recommended for critical or unfamiliar materials.
Conclusion
Injection mold rib repair requires more than restoring missing metal. The repair must preserve narrow profiles, maintain boss dimensions, control heat input, and leave enough material for accurate finishing.
Pulsed YAG laser welding can be a practical option for localized wear on small mold features when the steel, filler material, welding parameters, and finishing procedure are properly matched. Careful inspection before welding and dimensional verification afterward help ensure that the repaired mold performs as intended during production.
Post time: Oct-26-2026
