
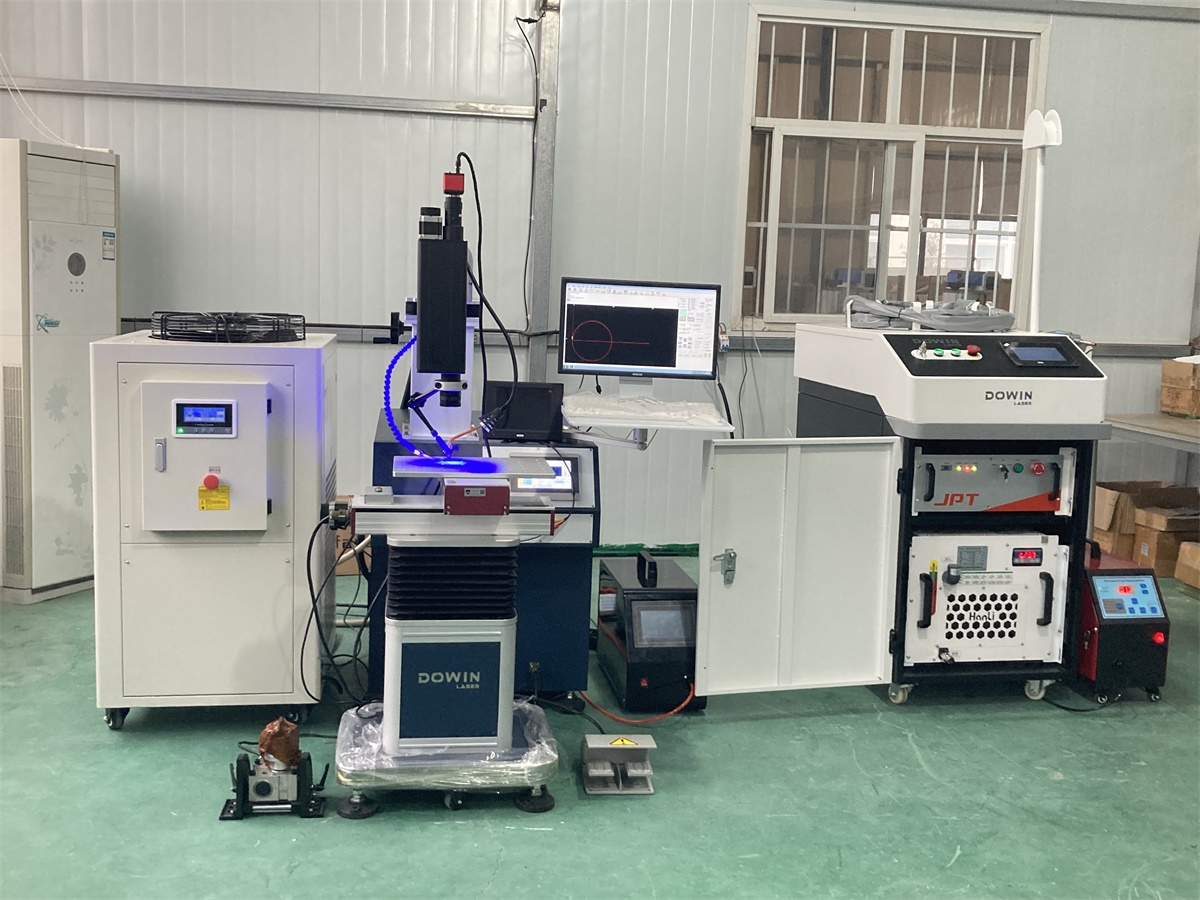
Yes, laser welding can restore some damaged mold venting grooves, provided the groove geometry can be rebuilt and the repaired area can be machined to the required dimensions. The main challenge is not simply adding metal, but restoring a very shallow, narrow channel that allows trapped air and gases to escape during plastic injection molding. Dowin’s laser mold repairing machines include equipment designed for precision mold repair, including pulsed YAG laser systems. These systems can be considered for localized wear, chipped edges, and damaged details where controlled material deposition is needed.
A successful repair must preserve both the vent’s depth and width, along with its connection to the venting path. If the groove is too shallow, trapped gas may cause burn marks, short shots, or incomplete filling. If it is too deep or too wide, molten plastic may enter the vent and create flash. The correct repair therefore depends on the original mold design, the type of damage, and the resin being processed.
1. Why Do Mold Venting Grooves Become Damaged?
Mold venting grooves are precision features, often located near the end of the filling path, parting lines, ribs, and other areas where air can become trapped. Over time, these grooves may require maintenance or repair for several reasons.
Wear and erosion
Repeated production cycles, abrasive fillers, and high-speed material flow can gradually alter the vent’s edges or surrounding surface. The result may be a groove that no longer provides consistent venting.
Damage during cleaning
Scraping, polishing, and aggressive cleaning can round off the groove edges or remove material from the venting surface. Even small dimensional changes can affect the molding result.
Excessive polishing or previous repairs
A previous repair may have reduced the vent depth, damaged its profile, or left an uneven transition between the groove and the surrounding cavity surface.
Corrosion and localized chipping
Corrosion or mechanical damage can create irregularities around the vent entrance. These defects may affect gas escape and make the surrounding surface difficult to clean.
Before welding, determine whether the problem is actually caused by the vent groove. Blocked vent passages, incorrect clamping, unsuitable injection settings, and other mold defects can produce similar symptoms.
2. Can Laser Welding Repair Every Type of Venting Groove?
Not every damaged vent requires welding. The first step is to identify what has changed and whether rebuilding the metal is actually necessary.
|
Damage condition |
Recommended approach |
|---|---|
|
Vent groove blocked by resin residue |
Clean the vent and inspect its dimensions first |
|
Groove too shallow after excessive polishing |
Evaluate precision material buildup followed by machining |
|
Chipped vent edge |
Consider localized laser welding if the damaged area is accessible |
|
Deep scratches across the venting surface |
Determine whether the defect affects the vent land or the surrounding sealing surface |
|
Groove too deep, causing flash |
Evaluate controlled re-machining or another suitable correction |
|
Cracked steel around the vent |
Inspect crack depth and extent before choosing a repair method |
The important distinction is between restoring damaged steel and redesigning the vent. Laser welding can add material to a worn or chipped area, but it does not automatically correct a venting system that was incorrectly designed.
Proper vent dimensions are resin-dependent. For example, Avient’s injection molding guidance gives a typical vent depth of 0.012–0.025 mm for certain GLS thermoplastic elastomers. This illustrates why even a small dimensional error can matter; the correct specification must come from the actual resin, mold drawing, and molding requirements
3. How to Restore a Damaged Mold Venting Groove With Laser Welding
For suitable defects, a controlled repair process helps rebuild the missing metal without unnecessarily changing the surrounding mold geometry.
Step 1: Measure the Original Vent Dimensions
Before welding, establish the intended groove depth, width, length, and profile.
Useful references include:
-
The original mold drawings or CAD model.
-
An undamaged equivalent vent on the same mold.
-
Existing inspection records.
-
Measurements from a suitable precision measuring instrument.
Do not estimate the original groove depth from visual appearance alone. A groove can look acceptable under magnification while still being dimensionally incorrect.
Step 2: Clean and Inspect the Damaged Area
Remove contamination using an approved mold-cleaning procedure. Inspect the groove, adjacent parting surface, and vent outlet.
Determine whether the damage is localized material loss or part of a larger problem involving the shut-off surface, insert fit, or vent passage.
If the groove is merely clogged, welding is unnecessary and could make the situation worse.
Step 3: Select a Suitable Mold Repair Welding System
For small, localized defects, a pulsed YAG mold repair laser welder is worth evaluating because it supports controlled, localized filler deposition.
Dowin’s YAG Mold Laser Spot Welding Machine lists DW-200W and DW-400W models, with pulsed Nd:YAG operation and an adjustable laser spot specified at 0.2–0.3 mm. These specifications make the equipment relevant for evaluating precision mold repairs, although suitability for an individual vent must be confirmed through testing.
The critical consideration is not simply the machine’s rated power. The operator must be able to control the deposited material, access the damaged location, and preserve the surrounding steel.
Step 4: Deposit Compatible Filler Material
After preparing the damaged area, select filler wire compatible with the original mold steel and its service requirements.
Apply material only where the steel has been lost. Excessive buildup creates more finishing work and can increase the risk of changing adjacent surfaces.
For very shallow vent features, the repair plan should account for the limitations of the welding spot, filler-wire diameter, and access angle. Some defects may be too small or too close to a critical edge for reliable manual deposition without specialized preparation.
Step 5: Restore the Groove Through Precision Finishing
Once the deposited material has been processed according to the qualified repair procedure, restore the original vent geometry through suitable precision machining or controlled finishing.
This is often the most demanding stage of the repair.
The finishing operation must restore the required depth and width without:
-
Rounding the vent entrance.
-
Creating an uneven groove bottom.
-
Damaging the adjacent shut-off surface.
-
Leaving burrs or grinding marks that obstruct gas flow.
-
Making the vent excessively deep and increasing flash risk.
For a critical vent, use the original drawing and a suitable measurement method rather than relying exclusively on visual inspection.
Step 6: Verify Venting Performance
After repair, inspect the groove and confirm that its outlet is unobstructed.
Reassemble the mold as required and conduct a controlled molding trial. Evaluate the original defect location for burn marks, short shots, flash, and other signs of inadequate or excessive venting.
If the original problem persists, investigate other potential causes, including vent blockage elsewhere, mold clamping, filling conditions, and the location of trapped air.
4. Why Is Precision Finishing More Difficult Than Welding?
The welding operation restores missing material, but the final vent dimensions determine whether the mold performs correctly.
This is particularly important for vents located on the parting line. Their shallow geometry must allow gas to escape while restricting the flow of molten plastic.
Three issues deserve particular attention.
Depth control: Excessive material removal can make the groove too deep, while insufficient finishing can leave the vent partially blocked.
Surface continuity: A rough transition between the repaired area and the original steel can interfere with cleaning and gas flow.
Parting surface integrity: If welding or grinding alters the adjacent shut-off surface, the repair may introduce flash or create a new fitting problem.
Where the groove is extremely shallow, conventional hand grinding may be difficult to control. Depending on the mold design, precision grinding, micro-machining, or another suitable finishing method may be needed.
5. Laser Welding vs. Replacing the Damaged Mold Insert
When a vent is damaged, the choice between repairing the existing insert and replacing it depends on the extent of the damage and the required precision.
|
Factor |
Laser welding and finishing |
Insert replacement |
|---|---|---|
|
Localized edge damage |
Often worth evaluating |
May be unnecessary |
|
Extensive cracking |
Requires careful assessment |
Often worth considering |
|
Restoration of shallow grooves |
Possible with suitable finishing |
Can be appropriate when precision cannot be recovered reliably |
|
Existing insert availability |
Can reduce the need for replacement |
Depends on manufacturing lead time |
|
Overall cost |
Depends on welding and finishing time |
Includes manufacturing, fitting, and validation |
|
Dimensional certainty |
Depends on repair capability and inspection |
Depends on replacement machining and fitting quality |
Laser welding can be economical when damage is localized and the original mold remains serviceable. Replacement may be the better choice when the damage is extensive or when the repaired geometry cannot be verified to the required standard.
The decision should consider total downtime and validation requirements, not just the time spent welding.
6. How to Choose a Dowin Laser Welder for Mold Vent Repair
Dowin offers different equipment configurations for mold maintenance. The appropriate choice depends on the size of the mold, the accessibility of the vent, the type of damage, and the required repair precision.
-
DW-200W / DW-400W YAG Mold Laser Spot Welding Machine: A candidate for evaluating localized repairs to small mold features, chipped edges, and worn surfaces.
-
DW-200W QCW Fiber Laser Welding Machine: An alternative to evaluate for compatible mold repair applications where its process characteristics and working arrangement meet the requirements.
-
Crane Arm Laser Welding Machine for Mold Repair: Designed for greater flexibility when accessing large, medium, and small molds.
These systems are not interchangeable for every repair. Before selecting a machine, provide the supplier with the mold steel grade, the original vent dimensions, the extent of damage, and photographs or drawings of the affected area.
For a particularly shallow vent, request a representative sample repair and dimensional verification before committing to a production procedure.
Frequently Asked Questions
Can laser welding restore a vent groove that has become too shallow?
Potentially, yes. If excessive polishing or wear has reduced the groove depth, a suitable repair may involve rebuilding the affected steel and machining the vent back to its specified dimensions. Whether this is practical depends on the damage and the precision achievable during finishing.
Will laser welding block the venting groove?
It can if filler material is deposited across the channel or if the finishing process fails to reopen the required profile. The repair should therefore focus on the damaged steel, followed by dimensional inspection and confirmation that the vent passage remains unobstructed.
Can laser welding fix burn marks caused by poor mold venting?
Laser welding can repair physical damage to the mold’s venting features, but it does not automatically solve the underlying cause of burn marks. The vent path, trapped-air locations, resin condition, and molding parameters should also be checked.
What is the biggest risk when repairing shallow vent grooves?
The main risk is failing to restore the correct geometry. A vent that remains too shallow may not release trapped gases effectively, while an excessively deep vent can allow molten plastic to escape and create flash.
Is pulsed YAG laser welding suitable for hardened mold steel?
It can be suitable for certain hardened mold steels, but the result depends on the steel grade, hardness, filler material, and welding procedure. Heat-affected zones and cracking risks must be evaluated, particularly for critical venting and shut-off features.
Conclusion
Laser welding can restore damaged mold venting grooves when the defect involves localized material loss and the original geometry can be accurately reconstructed. The most important stages are measuring the original vent, selecting a compatible repair process, controlling filler deposition, and finishing the groove to its specified dimensions.
For mold makers, pulsed YAG laser welding is one option worth evaluating for small vent edges and localized damage. Dowin’s mold repair welding equipment provides configurations to investigate for these applications, but the final choice should be based on a representative repair test and verified dimensional results rather than laser power alone.
Post time: Oct-26-2026
